Refinishing a Vintage ceramic table lamp using chalk paint by Annie Sloan.
Dealing in Antique and Vintage lighting brings you into contact with a wide range of old products, some of which you end up owning almost by mistake or by default.
This is a brief story of long forgotten and badly neglected table lamp and how the lamp was bought back to life with Annie Sloan chalk paints. Annie Sloan chalk paints and finishing products are really excellent and allow people with no artistic skills to refinish a range of everyday items quite simply and easily. The internet is awash with Annie Sloan chalk paint ideas.
Back to our lamp.
Live real life auctions are great places to buy. If you are like me you may well see an item that takes your fancy but is part of a “lot” of items; sometimes these lots can provide some interesting pieces but more often than not the lots are packed out with “fillers” At a recent auction I won a lot of used lighting, in amongst the filler items was our neglected and long forgotten ceramic table lamp. The lamp was covered in a variety of stains and had a dirty and sticky feel, it really was quite grim but the more I looked at it the more I liked its shape and profile so I decided to investigate the lamp a little bit further.
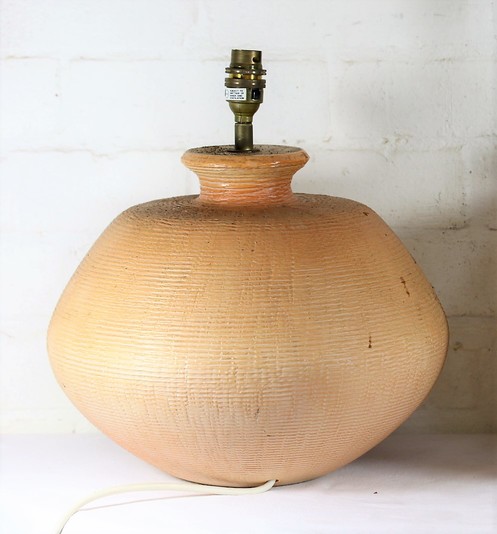
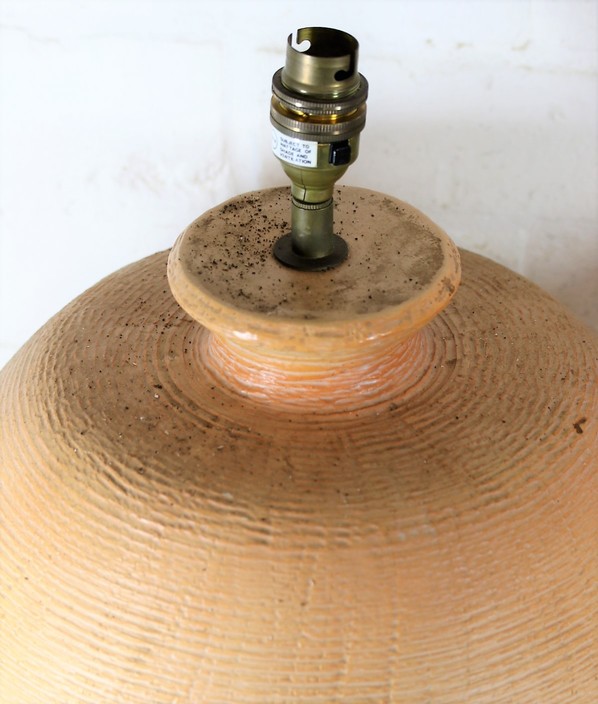
Here is the old lamp as found – Yuk.
The first thing to do (after putting on gloves) was to strip the lamp of its wiring and electrical fittings and clean of the years of grease and dirt, once clean it would be much easier to see what potential it had hidden away under the years of neglect.
Once cleaned and dried I discovered a number of interesting facts about the old lamp base.
• Underneath was an old paper sticker that dated the lamp to 1977.
• The lamp was originally manufactured in Portugal.
• The ceramics are of very decent quality with a thick glazing inside as well as outside.
• Decorations – the ceramic surface had deep hand applied pressed Horizontal indentations made in a rustic style.
• The bulbous shape and profile of the lamp base is actually really nice and has a bit of an Ethnic feel.
• The colour of the lamp is really unappealing, almost a washed out dirty yellow.
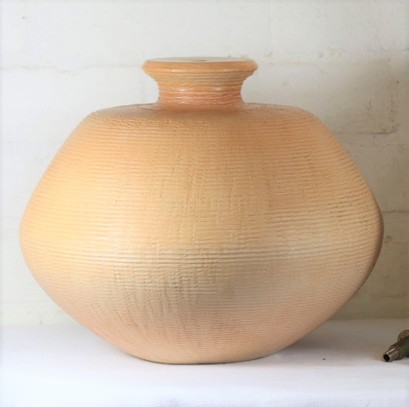
Here is the lamp base after cleaning.
All of a sudden I could see some potential in this lamp. Annie Sloan chalk paint is easy to use, covers well and is easily rubbed back to allow glimpses of original finishes to show through. Unfortunately in this case the original finish was insipid and not at all inspiring. I decided to give the lamp base a coat of Annie Sloan dark red paint called Emperor’s Silk which is an Aged Red with an Oriental feel.
Because of the plain colour of the ceramics I decided to give the lamp base a new undercoat colour before applying an Annie Sloan paint; I decided on Gold as precious metallic colours go well with Emperor’s Silk. This Gold undercoat would make the most of the deep rustic decorations applied back in the 1970s.
The first job was to lightly roughen the surface of the ceramics to give a slight key to paint that was to follow. After this the lamp base was given a rough coat of spray paint in old Gold and was left to thoroughly dry overnight.
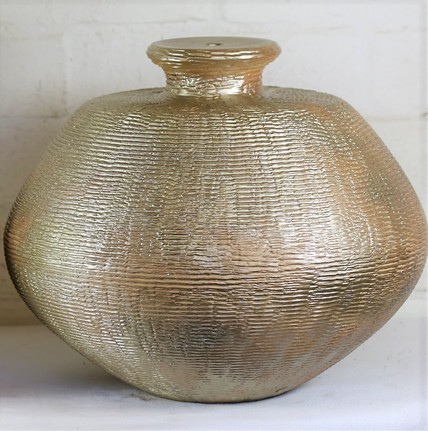
The lamp base lightly roughened, and sprayed Gold.
Now came the time for the Annie Sloan paint application. Annie Sloan chalk paint can be easily thinned with water but I wanted to paint the lamp base with one reasonably thick coat. The Emperor’s Silk was applied using vertical paint brush strokes which allowed some of the deep horizontal indentations to remain Gold, this provided a good contrast between the Red and aged metallic Gold.
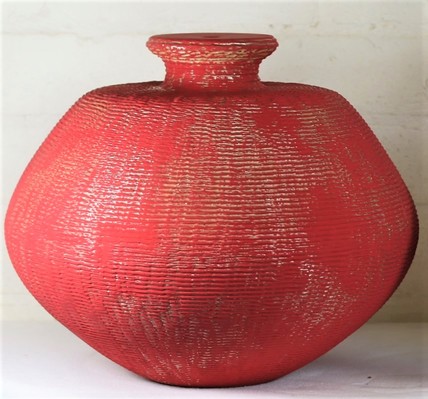
The Emperor’s Silk paint was left to dry overnight.
The next stage was to lightly rub down the lamp with fine sandpaper to reveal bit more gold and even a little of the original ceramic colour. Once the dust was removed the lamp was given a coat of Annie Sloan clear wax and was buffed.
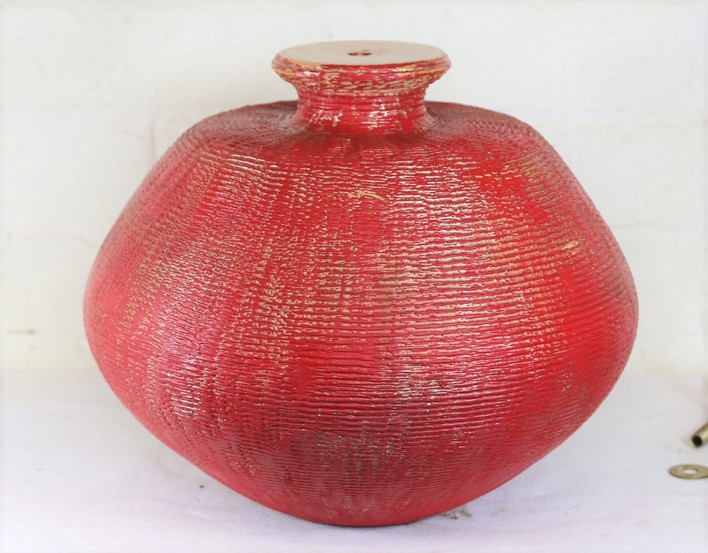
The new lamp base finish is now starting to take shape.
The lamp was now ready for rewiring, the original components were disposed of and the lamp was fitted with new wiring and components that comply with modern standards, I also decided to fit a brass riser at the top of the lamp to make the shade mounting a touch higher which would allow the full shape and profile of the base to shine when in use.
Once the lamp was rewired and tested it was given one final application of Annie Sloan wax, this time I used the dark wax as I wanted to age the Emperor’s Silk and also wanted to dull the Gold detailing.
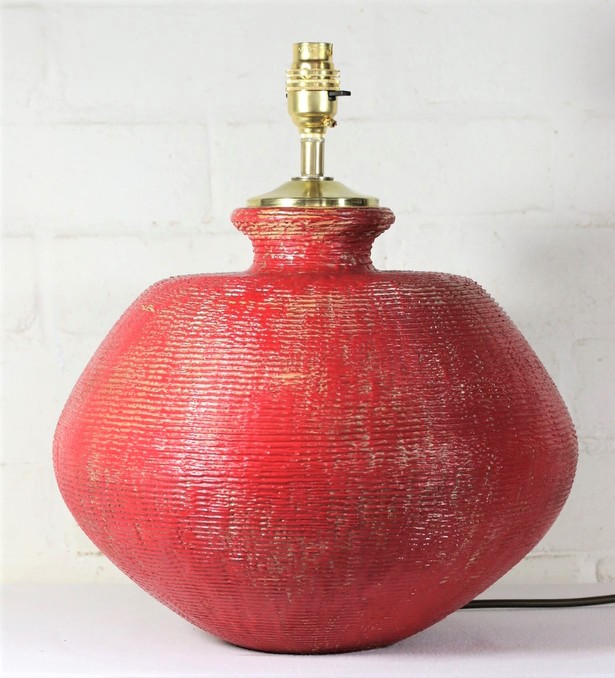
The finished lamp.
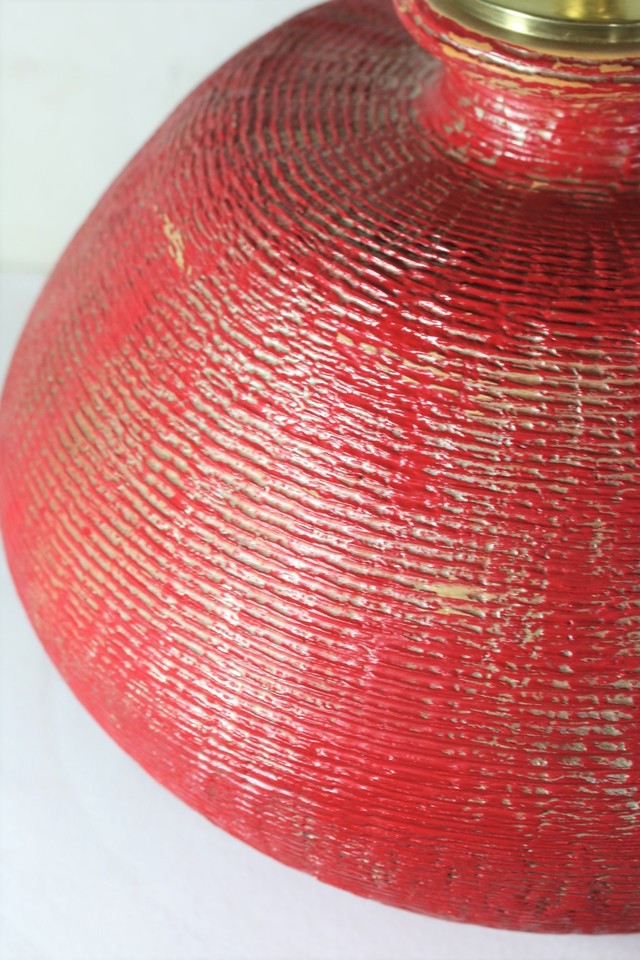
Here you can see the Gold details working well with the Annie Sloan Emperors silk.
The lamp base was fitted with a neutral ivory pleated lampshade and was put into use. The extra shade mounting height allows the full profile of the lamp to shine and the new colours and the original ceramic textures now highlighted by the Annie Sloan paint finish really come to life.
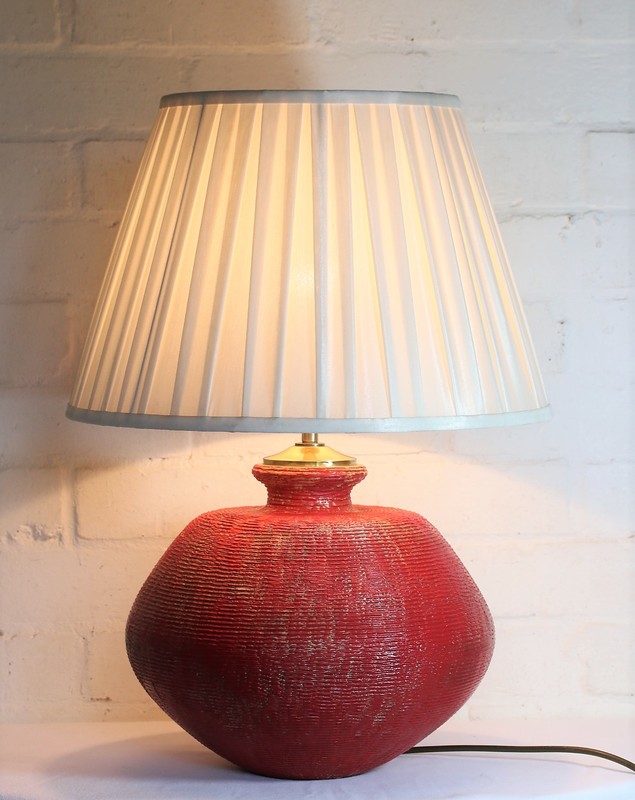
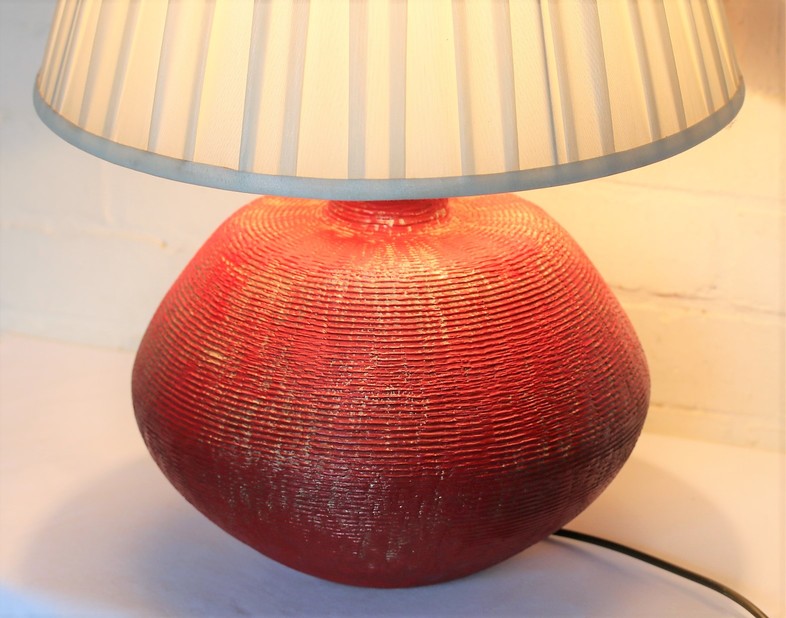
When I found this lamp at Auction It looked ready for the recycling centre, but with a little attention and the application of the wonderful chalk paint by Annie Sloan the lamp has new life. The colour is now vibrant and attractive and the ceramic textures are highlighted.
Materials – Degreaser cleaner. Medium sandpaper. Gold spray paint. Annie Sloan Emperors silk paint, clear wax and dark wax. Earthed Wiring. Earthed Brass bulb holder. Wiring components and a second hand brass riser plate.
Time Spent on the lamp – 2.5 Hours.
I often have a number of Vintage Industrial items for sale in my eBay shop – Hertfordshire Lighting and Design
With a little thought and a touch of imagination you can breathe new life into a whole host of tired old objects using Annie Sloan paints. I would love to hear from anyone who has performed a similar refinishing project; it’s always great to share ideas with other people.
If you have any questions or need advice on any item of Vintage lighting please contact me and I will do my best to help.
Michael Adkins. michael@hertfordshire-lighting.com
