A challenging but satisfying project providing new life to an Antique Fire Extinguisher.
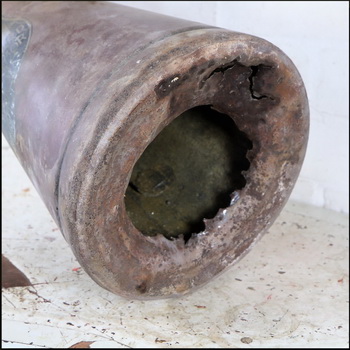
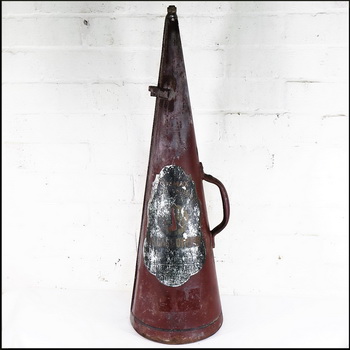
During a trip around a salvage yard I found myself in possession of a very neglected and very sad and sorry looking Vintage Mini-Max fire extinguisher. The extinguisher was found in a poor state, it had at some stage in its life been punctured at the base and had been left in the outdoor “bargain-basement” section of the salvage yard for quite some time. The result of this neglect and damage was evident but the extinguisher did have some potential, the extinguisher dates from around the mid 20th century and was originally a powder type extinguisher, the extinguisher is made of steel with a red painted finish and makers transfer to the front.
Despite the extinguisher being in the bargain-basement I did manage to get the price down a bit and to be honest I think that the seller was pleased to see the back of it.
This great looking old extinguisher was found with a grim appearance, but in my minds eye it had a lot going for it, the extinguisher is conical which makes the round bottom section, with some work, a great base being wide, stable and solid.
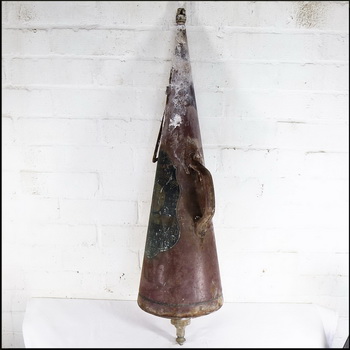
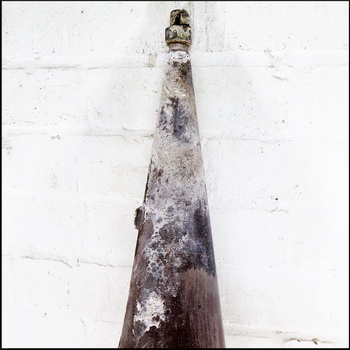
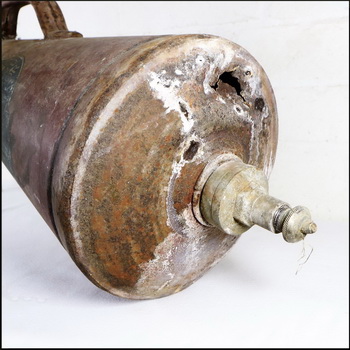
Here are some images of the old steel fire extinguisher as found.
Cutting & Carving.
As you can see the power and propellant had leaked across its surface and the base has a large puncture hole. Despite the finish looking beyond salvage there is some potential there, especially if, like me, you like the extreme industrial look. The first thing to do with a project like this is to figure out your wiring route and to remove old and unwanted parts. The round base of the extinguisher was cut out using a drill and a hacksaw blade and the old fitting at the top of the extinguisher was loosened and unscrewed. When you get access to the inside of an old fire extinguisher you will usually find the guts of the unit, these internal parts nearly always get in the way of converting an extinguisher so they need to be removed. The parts inside this old MiniMax extinguisher were tricky to remove, the tools I used were a large hammer and a large chisel, there was no refined use of specialist tools it was just a case of banging and cutting the parts out. The Iron base was hammered back and curled over into the body of the extinguisher to hide any sharp edges.
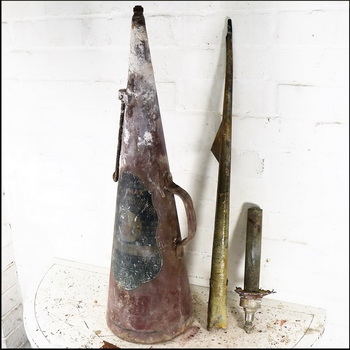
Here is the extinguisher stripped down and showing its redundant internal parts.
The new lamp base.
Cleaning the extinguisher.
Now the extinguisher was cut and smoothed out it was time for a clean. The metal was gently rubbed with warm soapy water cleaned with WD40, where the old remnants of powder and propellant has set the paint came away and the transfer was affected by splashes of the old contents.
Making a wiring route for the new lamp.
Luckily the old extinguisher needed very few components to make it into a modern and safe electrical table lamp. The lamp needed a length of standard 10mm all thread tube, nuts and an old salvaged steel base that was saved from an old table lamp, this base fits inside the extinguisher and the threaded rod was passed though the top outlet hole, this then allowed a clamping action to fix the threaded rod into place using a tight fit inside the extinguisher. The cable entry point was made using a short length of 10mm all thread tube bolted into the position at the back of the extinguisher.
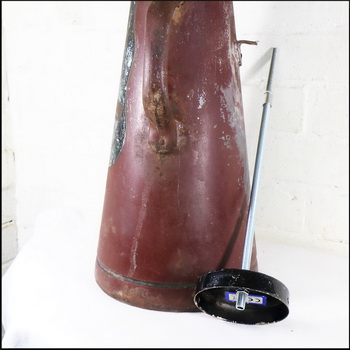
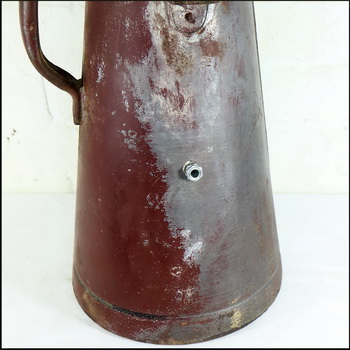
New parts for a safe and solid lamp wiring route.
Wiring the extinguisher lamp.
This excellent piece of industrial history will now need wiring and will need some modern fittings and components to make it into a usable and decorative lamp.
When restoring or making any lighting there are several important safety points to remember.
- Always follow your local or national standards and only use components that meet your countries regulations.
- In the UK metal lighting such as this lamp needs to be earthed (grounded), check the wiring standards in your country.
- Always smooth down and fit protective plastic or rubber grommets to areas, such as tubing, where your cable passes.
- Always fit a cable-stay, point where the cable is fixed that will stop the wiring being pulled out of your bulb holder in the event of the cable being pulled or the lamp dropped.
The small length of tube at the back of the extinguisher is where the cable-stay was fitted, along with small top hat grommets to each end of the threaded tubes meant that the lamps new wiring was fully protected and these small components would meet all the important modern safety issues.
A Bulb holder was wired up and fitted into the lamp part, you will be able to see UK wiring here which shows Green & Yellow for Earth – Blue for Neutral – Brown for Live.
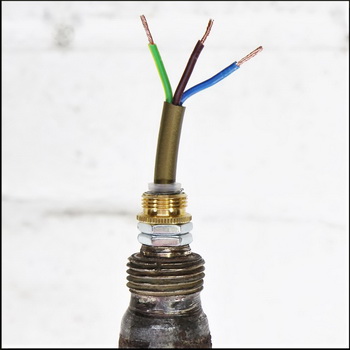
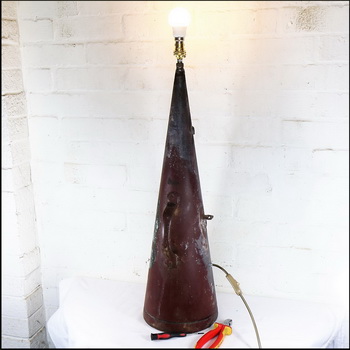
With the bulb holder fitted this Antique lamp now met modern safety standards.
Refinishing the extinguisher lamp.
Now the lamp was wired it was time to give the extinguisher a new finish. At the base the lamp was covered with green felt, this green felt makes a great finish for table-top lighting, it is available on line and from craft shops and I fit the felt with strong spray carpet glue which ensures the felt stays firmly in place. The steel body was finished with two coats of Micro Crystalline finishing wax which is a fantastic product and brings out shine, textures and fine detail in the steel and finish of the old extinguisher.
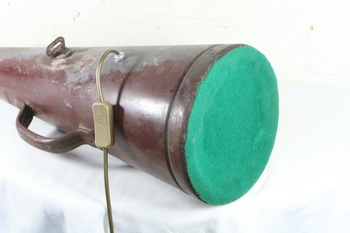
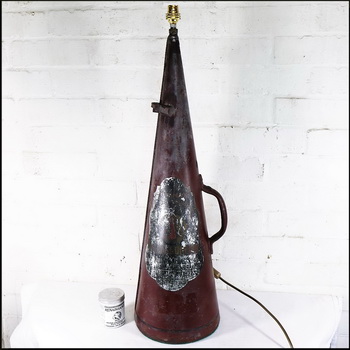
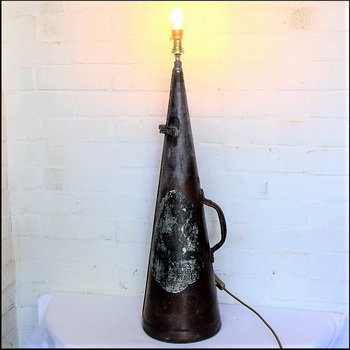
The finished lamp.
In Use.
With the revived finish complete the original industrial design and shape of the extinguisher started to shine and is now ready to be used for its new purpose of lighting a space. In use and with a shade fitted the lamp comes to life, this handsome extinguisher lamp would make a great addition to any man cave, or a contemporary space that needs a touch of industrial chic and with its wide round base and stability, the restored vintage extinguisher lamp base would make a good desk lighting option for a large welcome table in a café or restaurant.
Conclusion.
The skills of the original makers made this extinguisher well worth restoring and it was a pleasure to work on such a great looking and made old piece of metal, it was a trick job and took several hours however it is great to think that the old extinguisher will now live on. I am really happy with the result and I am delighted to have provided this wonderful piece of industrial history with new life.
I often have several Vintage Industrial items for sale in my eBay shop here – Hertfordshire Lighting and Design
If you fancy a piece of Antique or Repurposed lighting you can usually find some great examples at the on line store VINTERIOR which you can visit by clicking HERE
Materials
– Earthed Wiring. Earthed Brass bulb holder. In Line on/off switch. 10mm Tube, Nuts and Grommets. Salvaged metal parts. Plastic cable stay. Cleaning fluids and sundries.
Time Spent on the lamp – 5 Hours.
I would love to hear from anyone who has performed a similar refinishing project; it’s always great to share ideas with other people.
Even a simple restoration project can bring a great sense of satisfaction and is great fun. I would encourage anyone to bring new life to an old Antique item.
- Shop around.
- Find an item.
- Give it some thought.
- Do a bit of research.
- Restore.
- Antiques are Green!
If you have any questions or need advice on any item of Vintage lighting please contact me and I will do my best to help.
Michael Adkins. michael@hertfordshire-lighting.com
