Old Wood is Beautiful.
Wood is a naturally beautiful material. When I find an Antique wooden item there are two types of beauty that I love. One is the patterns, grain and natural decorations of old wood which come from tree growth and nature. If you hold in your hand an Antique wooden item made 100 years ago you must remember that the actual wood the item is made from is probably another 100+ years old.
The other beauty that Antique wooden items have are man-made, these decorations are the bumps, scratches, dents and signs of a long working life and also the signs of original manufacture that add something immeasurable to the beauty of the item. These marks are the history of the item and if you can appreciate these marks they are a huge bonus.
A well used Antique Farmhouse Stool.
I recently acquired a really lovely Antique wooden stool. Antique wooden stools have always been popular and are a simple, practical and flexible addition to any country themed space.
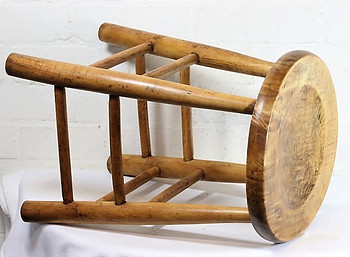
This stool has a classic Antique country look. It has beech legs, offset stretchers and a lovely round elm seat top. The manufacturer would have been a country woodworker making household items from a workshop in a beautifully wooded and peaceful part of the countryside, OK I am romanticising a bit but you get the general idea!
The stool was found in an OK condition. The joints of this stool are of the glued tapered peg type. The stool was found to be a bit wobbly and loose with the top seat top being very loose. At some time in its history, probably the 1970s, the stool was given a thick coat of quite horrible dark brown varnish, I am assuming that the person who did this wanted to hide the bumps and marks of the stools long life.

 Here is the Antique stool as found.
Stripping.
Restoring this Antique wooden stool is a fairly simple but very satisfying process. The first thing to do with this stool is to remove the cloying old varnish. The varnish was stripped using a professional paint stripper. Note – When using paint stripper make sure you work in a well-ventilated area or outside if possible, also wear gloves to protect your skin and goggles for eye protection. When using paint stripper follow the makers instructions. The old varnish on this stool required a thick heavy coat of stripper that was left and double-brushed to get under the varnish and onto the wood surface. The stripper and old varnish was then removed with wire wool and white spirit. With the varnish removed the shade of the lovely old wood was instantly lightened and some beautiful grain and marks appeared.
 The stripped stool.
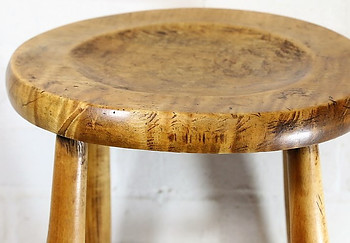
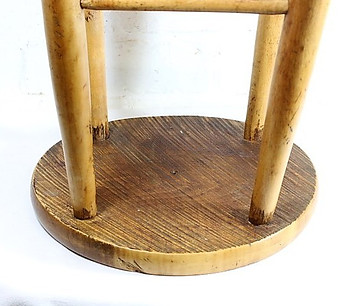
Once the stool was stripped and dried out it was time to reattach the seat top. Being hand made the stool top only fits in one orientation. The stool top joints were cleaned out and reglued using the finest wood glue available which is called “Tightbond” Once the glue was set the stool was refinished using reducing grades of wire wool starting at grade 1 and reducing to grade 00. Once refinished the wood was cleaned using a fabulous cleaning and nourishing oil called “Liquid Gold” As soon as the wood was cleaned it came to life. The wood was found to have beautiful graining with some figuring to the stool top. The dents, marks and signs of use also started to shine and the history hidden by the varnish was bought to the surface. Signs of manufacture also started to show, saw marks and finishing marks became clear, the underside of the stool top has wonderful band saw marks from the original mill cutting, the stool top has a lovely dished uneven top from its original drying process.
Final finishing.
Now the stool is solid it just needs a final finish. The stool was given a 2 part wax finish. The first coat was a dark wax called “Briwax” this dark wax slightly emphasises the grain and marks. The final finish was a coat of “Renaissance Micro-Crystalline” wax which is a fantastic finishing product that hardens and protects the wood.
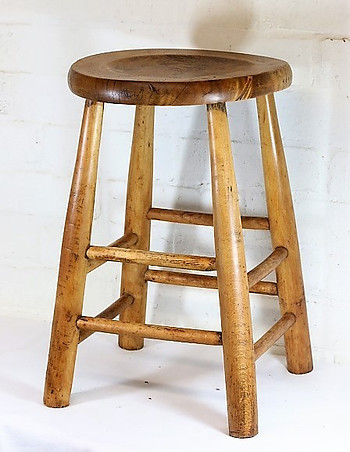
Here is the stool with its new finish.
Conclusion.
This old Antique stool has now come back to life, the wood now shines. The history of manufacture and use are there to clearly see and admire. This Antique stool from the early 20th Century will now last another 100 years and will add a great touch to any country setting.
Materials – Paint Stripper. Wire Wool. Tightbond wood glue. Liquid Gold wood oil. Dark Oak Briwax. Renaissance Micro-Crystalline finishing wax.
Time Spent on the Stool – 3.5 Hours.

I hope that you have enjoyed reading my post and that this may encourage you to “go green” and give life to a Vintage or Antique item.
I often have a number of Vintage items for sale in my eBay shop here – Hertfordshire Lighting and Design
I would love to hear from anyone who has performed a similar restoration project; it’s always great to share ideas with other people.
If you have any questions or need advice on any item of Vintage lighting or homeware please contact me and I will do my best to help.
Michael Adkins. michael@hertfordshire-lighting.com