Everyone loves something new and shiny. We all love new stuff, its human nature.
However, in this fabulous era of recycling and reusing there are some fantastic opportunities to give new life to old and forgotten items that are destined for landfill or an incinerator.
I think it’s great that there is now a global awareness of making good and giving life to old unwanted items with websites like Etsy and EBay providing an outlet for people’s creativity.
If you find something that has been given up on but that you can see potential in, then you have the chance to make a one off piece of interior design ware that will be unique and only “yours”.
This is a description of a project to rescue and breathe new life into a very old and unusual Antique Table Lamp. I purchased this old wooden table lamp on EBay for a bargain price. I could see it had potential and wanted to see what could be done to bring it back to life.
When the lamp arrived at my workshop it looked a bit sorry for itself.

The Lamp was in two parts, it had no electrical fittings or components to put it together, it had several layers of old white paint from a history of being “refreshed” by previous owners.

The first task was to assess the lamp parts. I had been given an indication of the origins of the lamp. It was from Scotland and on close inspection I could see it was a very old “home made” job. The two parts were put together by an early upcycler back in the mid-20th Century. The Barley twist wooden column is made of Oak and is a reused part from an Antique piece of furniture. A square base appears to be made from Ash and has been made in a stepped design with rudimentary tools and has been made to suit the column.
The first job was to strip the layers of old paint using strong paint stripper, as always this was done in a well ventilated room. Paint strippers in high streets tend to be quite weak so I use professional grade stripper that I buy on line and it works really well. Paint stripper should be left until the paint really crackles and blisters.

This is the look you want to achieve with the paint stripper, it may take time and a few coats but once you get to this stage you are well on the way to removing the years of paint build up.
Once the paint stripper had taken a grip I started to remove the stripper and old paint with medium grade wire wool, wearing gloves as the paint stripper can sting, and as before working in a very well ventilated area.

Here are the parts of the lamp after paint stripper use and removal – You can see the colours of the original wood coming through – There is still quite a bit of paint to remove but nothing that a bit of wire wool rubbing and time will not sort out.

After 20 minutes of rubbing and scraping the beauty of the wood starts to show through and we can start to see some real beauty and age in the lamp parts.

The next stage is to assemble the lamp before final polishing and finishing.
It is best to get the lamp assembled and in one piece before final finishing as you will find that the finish will blend well and the final appearance will be more uniform. This lamp was assembled using countersunk screws and due to the nature of the lamps’ construction it was necessary to install the wiring at the same time as joining the base and column together.

Finishing the lamp.
The lamp was given another session with some fine wire wool and the wood was cleaned using natural cleaning oils. The lamp was then finished with three coats of dark wax and was given a good polish. Wooden parts of this lamp have many marks from life and use including dents and knocks in the wood, the base also has marks from manufacture. These marks are not polished out but are left as part of the history of the wood, I think that these marks add to the appeal of the lamp. Also, you will see that in some deep grained areas there are still slight remnants of the old painted finish, again these have been left as part of the history of the beautiful old timber. The lamp is also fitted with a Green Felt base underneath.

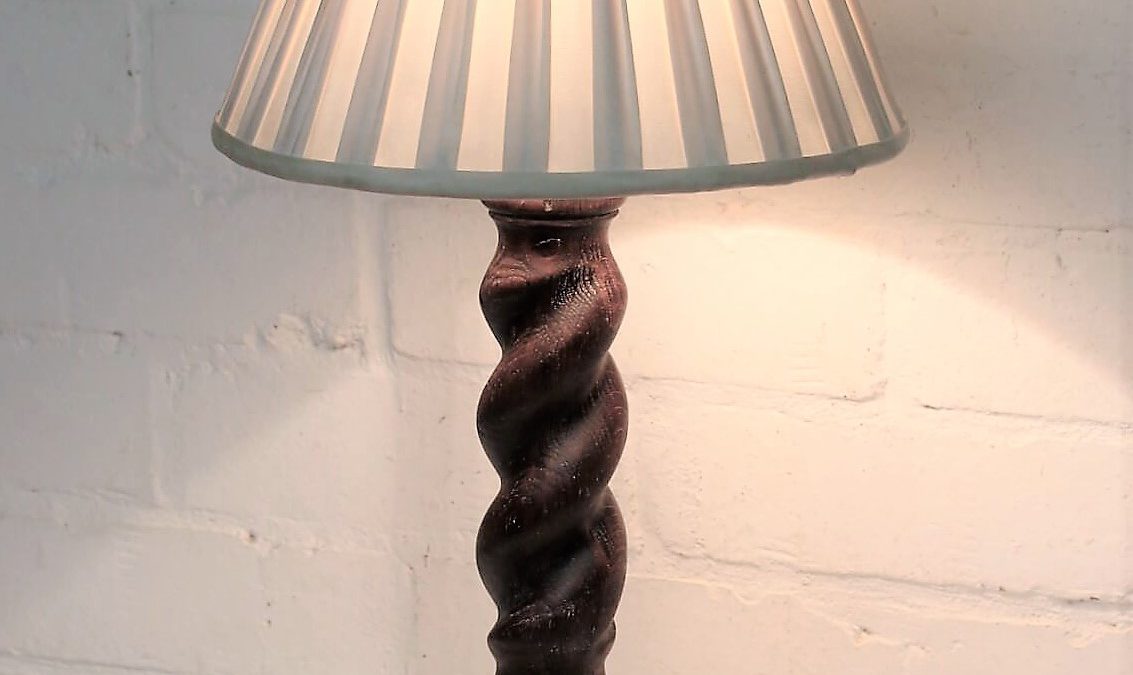
In Use.
Fitted with a shade and lit the lamp really comes to life, the illumination reflection from the shade highlights the past history of the timber and the lamp base speaks of times gone.
The lamp base is not perfect, but it is not meant to be, it will not be to everyone’s taste and may not fit many modern settings however if you have a go at restoring something like this you will truly have a one off.
I hope you like it.
Materials –
Paint Stripper. Liquid Gold cleaning oil. Dark Wax. Screws. Earthed Wiring. Earthed Brass bulb holder. Felt for the underside of the base.
Time Spent on the lamp – 2 Hours and 30 Minutes.
If you have a lighting project in mind and need some help or advice please ask and I will do my very best to help.
michael@hertfordshire-lighting.com